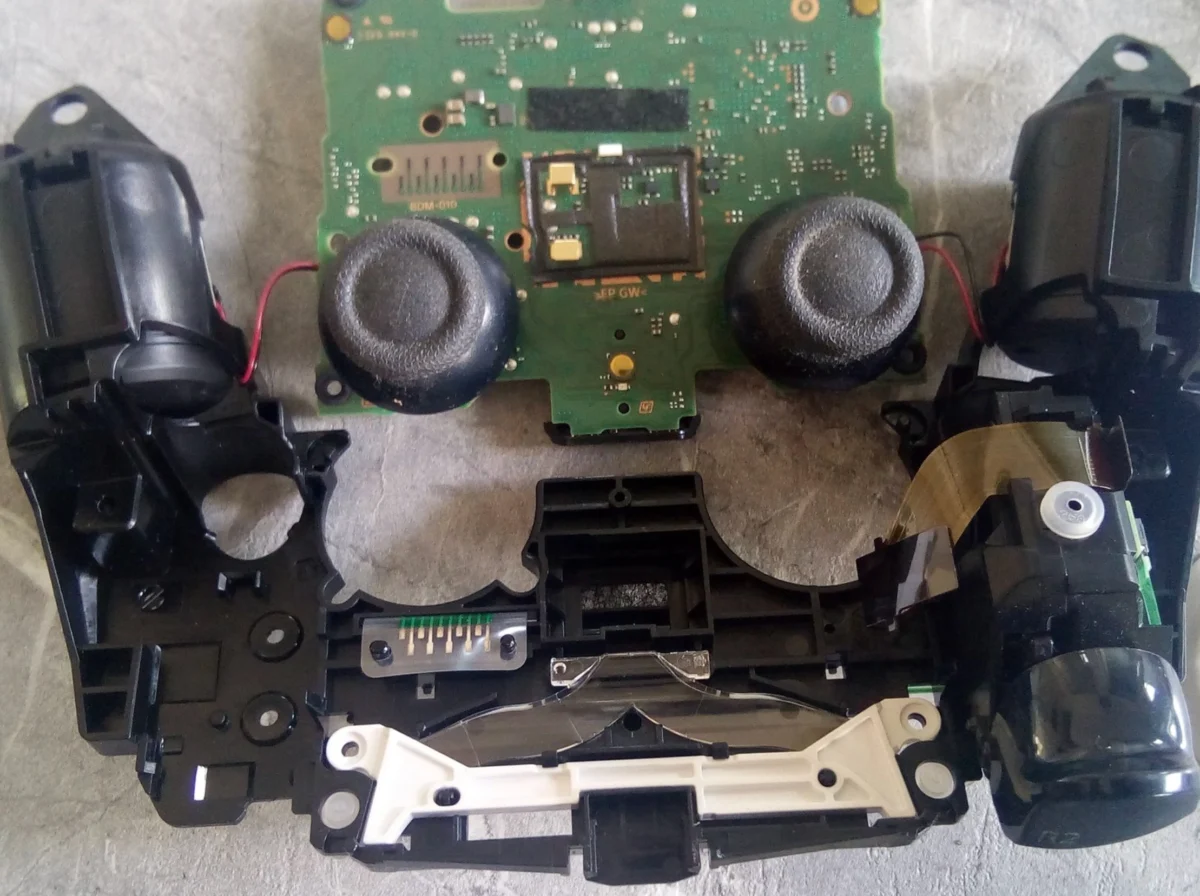
What’s Actually Inside Sony’s DualSense Controller
The DualSense (model CFI-ZCT1W) looks simple from the outside, but it’s genuinely one of the most mechanically complex controllers ever shipped with a home console. Between the adaptive triggers, dual haptic motors, and touchpad, there’s a lot happening under that plastic shell, and a lot that can eventually wear out or fail.
This guide breaks down every major component inside the DualSense, based on official teardown documentation, and links directly to real replacement parts for the pieces that most commonly need repair or upgrading.
The Outer Shell
The housing consists of two plastic shell halves (top and bottom), a trim piece running around the touchpad and grips, and rubberized grip inserts on the back. This is the most cosmetic part of the controller and also one of the easiest to replace, since it requires no soldering.
Shop trim pieces: Battle Beaver Customs — PS5 DualSense Trim Piece (available in multiple colors)
The Analog Thumbsticks (L3/R3)
This is the single most failure-prone component in the entire controller. Sony’s original design uses contact-based potentiometers — a metal wiper physically sliding across a resistive track to detect stick position. Over months of regular use, that wiper wears down the track, causing the infamous “stick drift” where the controller registers movement even when the stick is centered and untouched.
The aftermarket fix that’s become standard is a Hall-effect or TMR (tunneling magnetoresistance) replacement module, which uses a magnet and a magnetic sensor instead of physical contact, eliminating the wear mechanism that causes drift in the first place.
Shop Hall-effect thumbstick replacements:
- Hyperkin Hall Effect Joystick Replacement (2-Pack) — rated for over 5 million rotations, no soldering required
- ElecGear Hall Joystick Kit (HL-PS5) — includes calibration PCBs and desoldering tools, compatible with BDM-010 through BDM-040 boards
- Ikpek 4-Pack Hall-Effect Joysticks — budget-friendly multi-pack option
Note: if you own a DualSense Edge specifically, standard PS5 Hall-effect kits generally aren’t compatible — look for kits explicitly labeled for the Edge, such as the ZeroStick Pro TMR Module for DualSense Edge.
Adaptive Trigger Modules (L2/R2)
The adaptive triggers are considerably more mechanically complex than a standard shoulder trigger. Each one contains a small motor and gear train that varies resistance in real time based on what’s happening in-game, simulating sensations like pulling a tight bowstring or braking a vehicle. Internally, the two triggers aren’t identical: the right trigger includes a sensor capable of detecting both partial and full pulls, while the left uses a simpler on-off switch. Trigger flex ribbon cables connecting these modules to the main board are a common wear point independent of the trigger mechanism itself.
Haptic Feedback Motors
Instead of the old-style eccentric-mass rumble motors used in previous PlayStation controllers, the DualSense uses two linear resonance actuators (LRAs), manufactured by Foster. These use a voice coil, a permanent magnet, and wave springs to produce more precise, varied vibration feedback than traditional rumble motors, attached to the internal frame with adhesive tape rather than screws.
The Touchpad, Buttons, and Light Bar
The clickable touchpad sits above the main PCB and doubles as a button. Face buttons, the D-pad, and shoulder buttons (L1/R1) round out the standard input set, alongside the Share, Options, PS, Mute, and Create buttons. A light bar around the touchpad edge illuminates in different colors depending on player number or in-game context.
The Main Board, Battery, and Ports
The motherboard’s exact revision depends on when your specific unit was manufactured — Sony has shipped several internal board revisions under the same external model number, identified as BDM-010, BDM-020, BDM-030, BDM-040, and BDM-050. You can find which version you have by checking the second digit of the 17-character serial number printed on the back of the controller.
Beyond the board itself, the controller includes a built-in microphone, a small onboard speaker, a Bluetooth wireless chip, and a rechargeable lithium-ion battery pack. The USB-C charging port and its connecting flex cable are common failure points, particularly on controllers that are frequently charged while in use.
A Quick Buying Note Before You Order
A few things worth checking before you buy any part:
- Confirm your board revision first. Some kits (like the ElecGear HL-PS5 above) explicitly list which board revisions they support — ordering the wrong one means a part that won’t calibrate correctly, or won’t fit at all.
- Soldering-required kits are a real commitment. Several of the Hall-effect kits above require desoldering the original stick and soldering in the replacement, plus a calibration step. If you haven’t soldered before, look specifically for “no soldering required” / “plug and play” listings, like the Hyperkin kit above.
- DualSense and DualSense Edge parts are frequently not interchangeable, especially for thumbstick modules. Double-check the listing explicitly mentions your exact controller model before ordering.
Why Repair Instead of Replace?
A full replacement DualSense typically costs significantly more than a single replacement part. For a controller experiencing only stick drift, a $15–25 Hall-effect module swap can restore full accuracy at a fraction of the cost of buying a new controller, and with the added benefit of a component genuinely more failure-resistant than Sony’s original design.
Frequently Asked Questions
Why does DualSense stick drift happen?
The original thumbstick design uses a potentiometer with a physical metal wiper sliding across a resistive track. Repeated use wears down that track, eventually causing the controller to register phantom stick movement even when it’s centered and untouched.
Are Hall-effect replacement sticks actually better than the originals?
Yes, mechanically. Hall-effect and TMR modules use a magnet and magnetic sensor rather than physical contact, removing the wear mechanism that causes drift in the first place. They’re a widely used upgrade, not just a repair.
Can I replace DualSense parts without soldering?
Some kits are plug-and-play, but many Hall-effect thumbstick kits require desoldering the original module and soldering in the replacement, plus a calibration step. Check the specific listing before buying if you want to avoid soldering.
Disclaimer: No affiliate links are used in this article. All product links are provided purely as a convenience so readers can view and verify items directly on the retailer’s site — this blog does not earn a commission from any click or purchase made through these links.