As you know this blog is made with hostgator web hosting. It’s been around for 8 years and no serious problem by far using hostgator to host it. If you are interested to make one that is hosted with hostgator this post will explain it step by step. Here we go …
To start with, go visit hostgator site. Then click get started now. You will see 3 options : hatchling, baby and business plan. For just one wordpress blog, hatchling is enough. But there is one menu that can show you the comparison of all hosting plan available in hostgator.
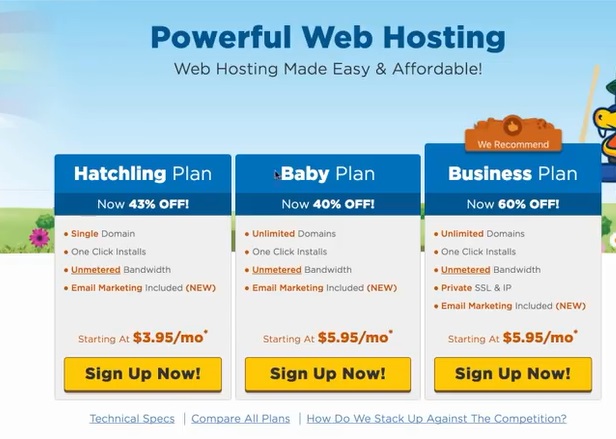
Click compare plans
Now let’s choose the hatchling plan.
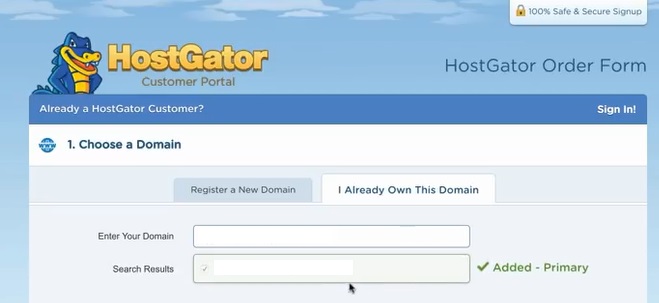
You will see menu to choose a domain name. You are going to see many of domain options but to choose .com or .org are the best for beginner because it can get popularity easily compare to other kind of domain name.
Next step is to choose the hosting plan
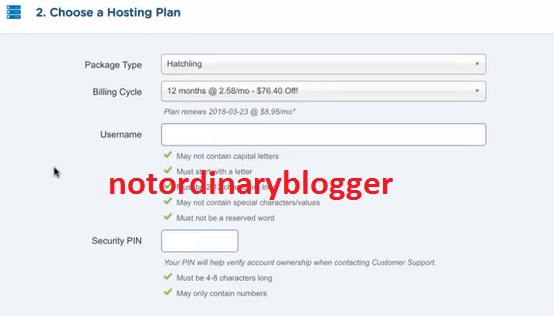
It is time to choose hosting plan. Make sure you have hatchling selected. 12 months is actually the cheapest price you can get and it is normal time your blog need to reach its popularity. And then fill your preferred username and PIN for security check when you need it.
Next step is Billing info
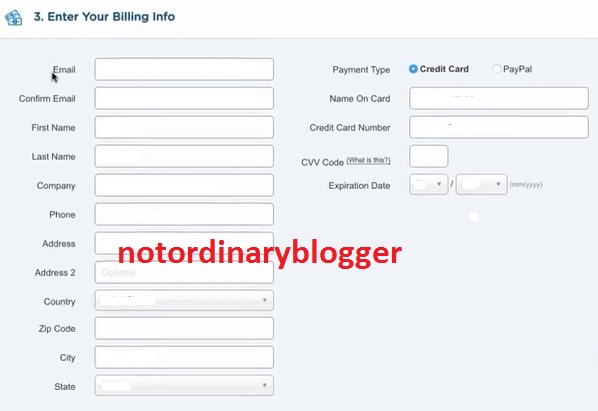
As the name of the phase, you are going to fill in billing information required. Just fill in everything on the menu
Next Step is for additional services
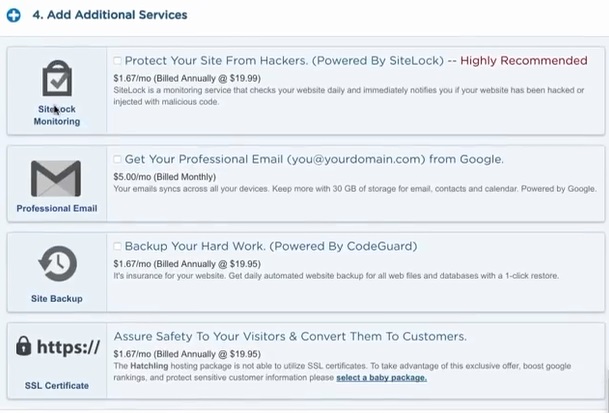
Here is optional which mean you are not oblige to buy the services offered. Some of them are useful like sitelockers, backup and https:// url. All of that kind of services can provide you higher security for your blog and better trust in the blog visitors point of view.
Since we are going to get the least amount possible this option can be bought next time when your blog growth exponentially.
Next Step Review Order Details
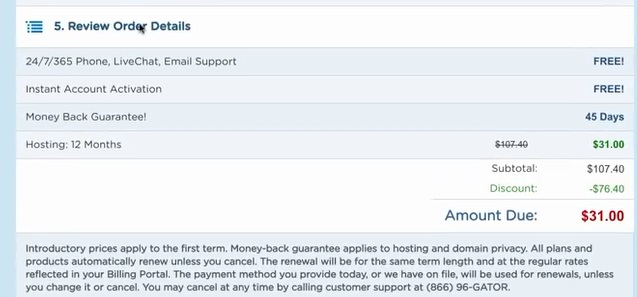
As you can see that’s the price you have to pay for web hosting a year using hostgator. The price is $31 for web hosting or $36 if you buy the domain name as well.
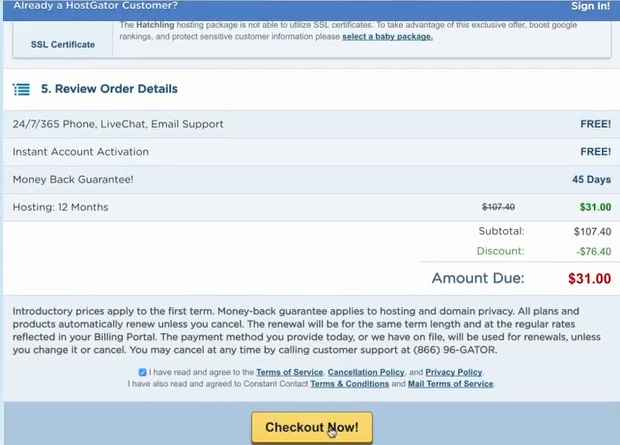
Don’t forget to check list the little box “I have read ….” Then proceed to check out now.
Congratulations
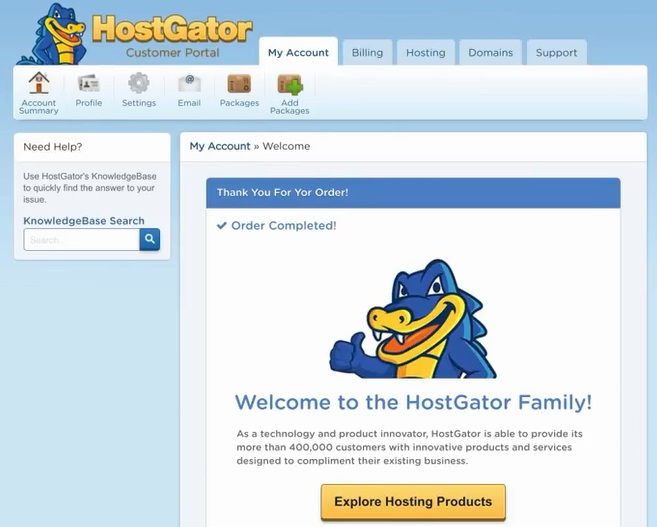
You are now hostgator family. If you see that screen it means your time to check your inbox email.
The first email you need to check is billing
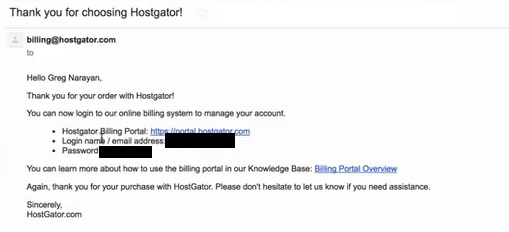
To install your wordpress just click link provided through email which stated “hostgator billing portal”
Then input the login credential you already have in email.
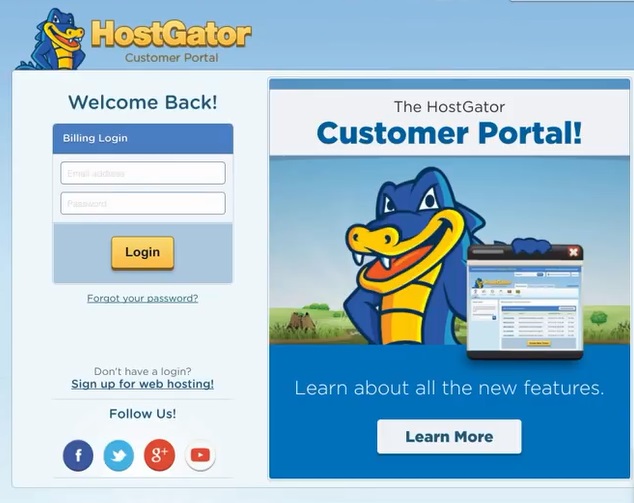
So this is the important first step you have done. You can enter your hostgator customer portal where everything about your wordpress blog can be managed.
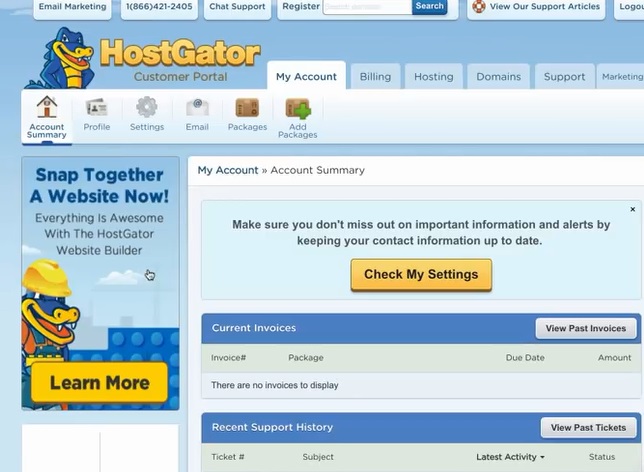
Click on hosting.
You can see screen as follow:
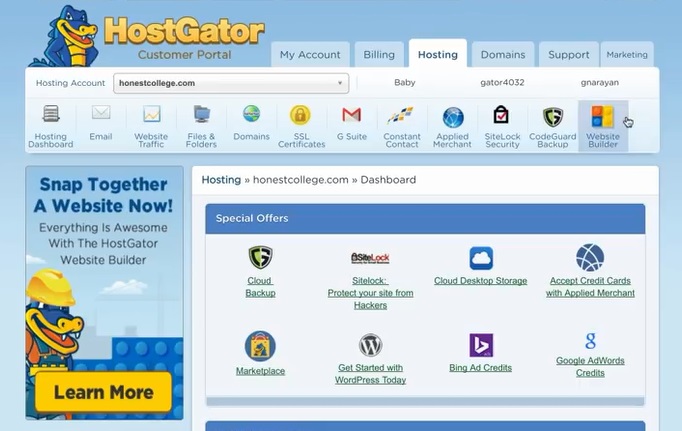
Before you proceed. It is time to check you email and open another inbox from hostgator team.
Open up the “no reply” email.
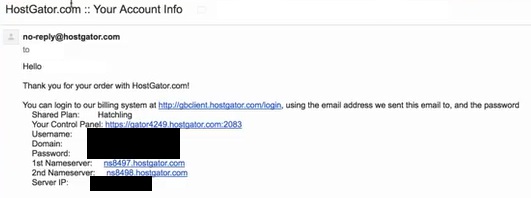
This email give you information about first server and second server which is two important information which will be used to connect your domain name and the hosting.
If you buy domain name from godaddy or namecheap you just need to login to their registrar and then follow the instruction as their live chat where to put your first name server or second name server and so your domain name point to your hosting.
Ok then, you just need to copy the name servers and back to the customer portal

Click on domain at the top.
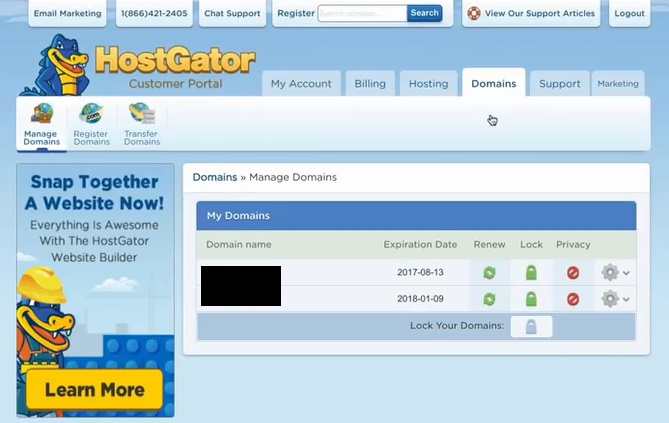
This is just example you will see domain name menu. Just click on the gear
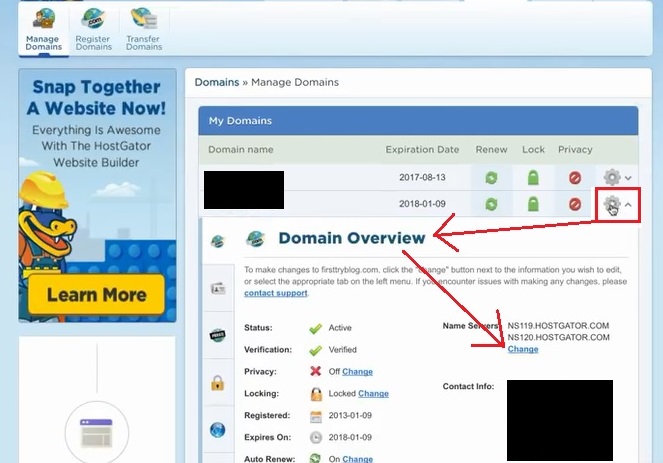
Then click on “change menu” on name server. See image above
What you are going to do is just to write over the two name servers.
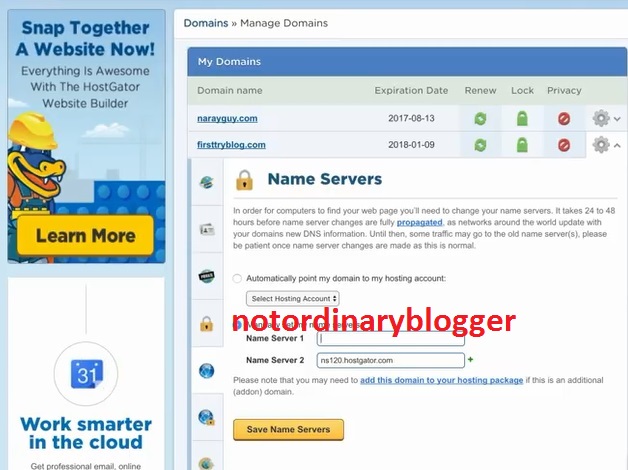
After you done it, click on save name servers
Then back to hosting
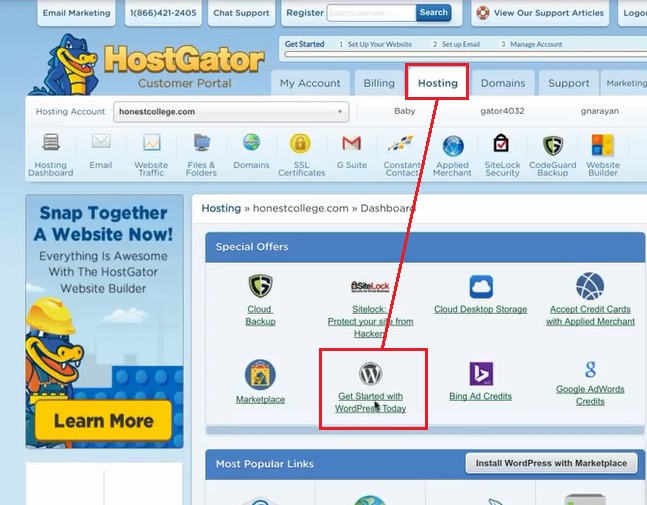
Here you need to click “get started with wordpress today”
Then all you need to do is select your domain name from the list (If you already have more than one domain names).

Let the “directory” menu blank. Don’t fill anything there. Click next
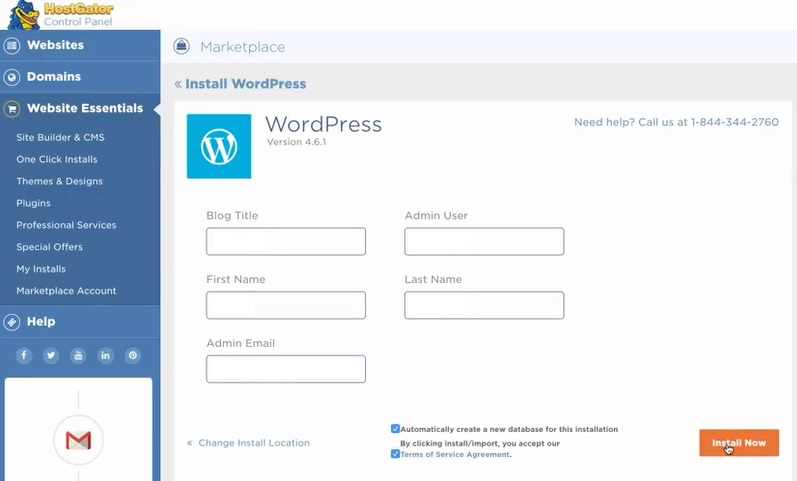
The you need to fill some information like “blog title”, “admin user”, “first name”, “last name”, “email”. The only important information you need to focus here are admin user and email because wordpress will remember you as admin and will send you login detail through that email address.
Once you done, mark the “term of service agreement” box and click “install now”
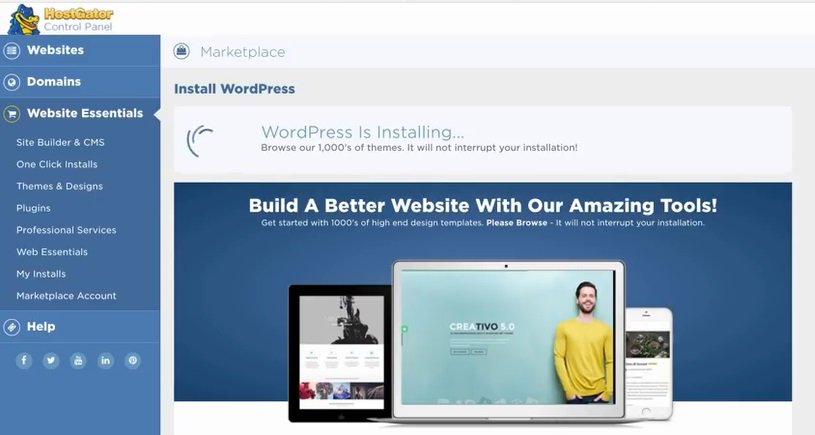
You will see wordpress installation in progress
This is the famous wordpress one click install that you might heard off.
The green check mark sign the installation is complete.

You don’t want to click on installation detail yet you need to copy the details and then paste it somewhere safe for your future login needs.
You want to do is to click “my install”

Here you can change your password. Click “update password” and then “admin login”.
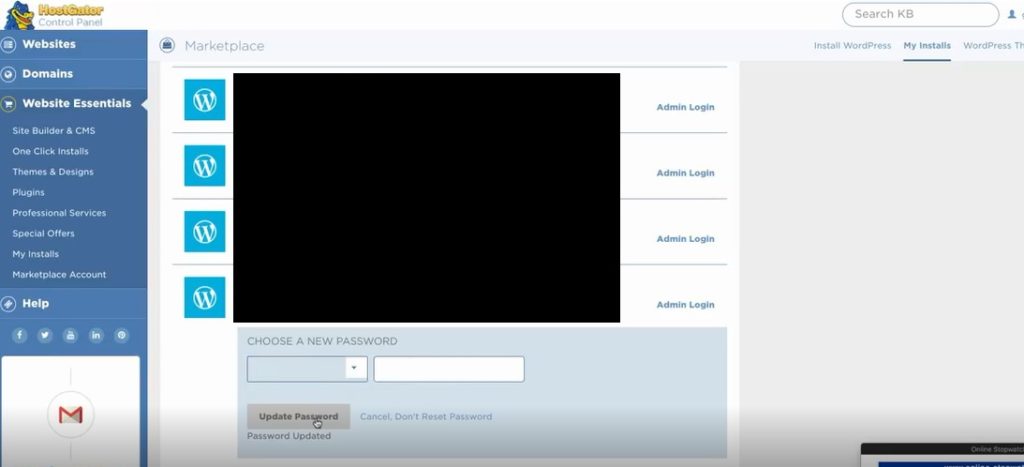
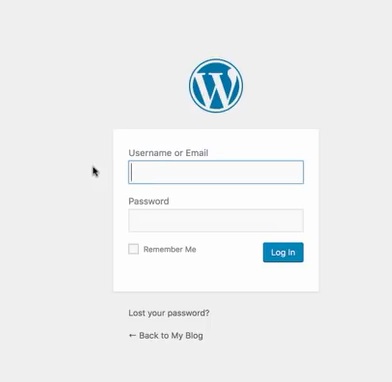
There you go, you can enter the login detail for your wordpress blog.
Important Notes:
You might have some problem like blank page or error page. It is basically because the server in your area and the hosting server are updating each other.
Also if you just connecting domain name from godaddy or namecheap it may take up to 72 hours to see your website live. It is called as propagation.
There you go. Now you already master how to make a wordpress blog with hostgator.
