Learn how to write a check with this simple guide. Find out how to fill out a check, endorse it properly, and void a check when necessary. Essential for U.S. taxpayers and businesses.
In today’s increasingly digital world, writing a check might seem like a thing of the past. However, checks remain a crucial part of financial transactions, especially for individuals and businesses who prefer or require paper payments. Knowing how to write a check properly is a key skill for managing finances, paying bills, and handling other financial obligations.
This guide will cover the essential steps on how to fill out a check, how to endorse a check, and how to void a check. Whether you’re new to checks or just need a refresher, here’s everything you need to know.
How to Fill Out a Check

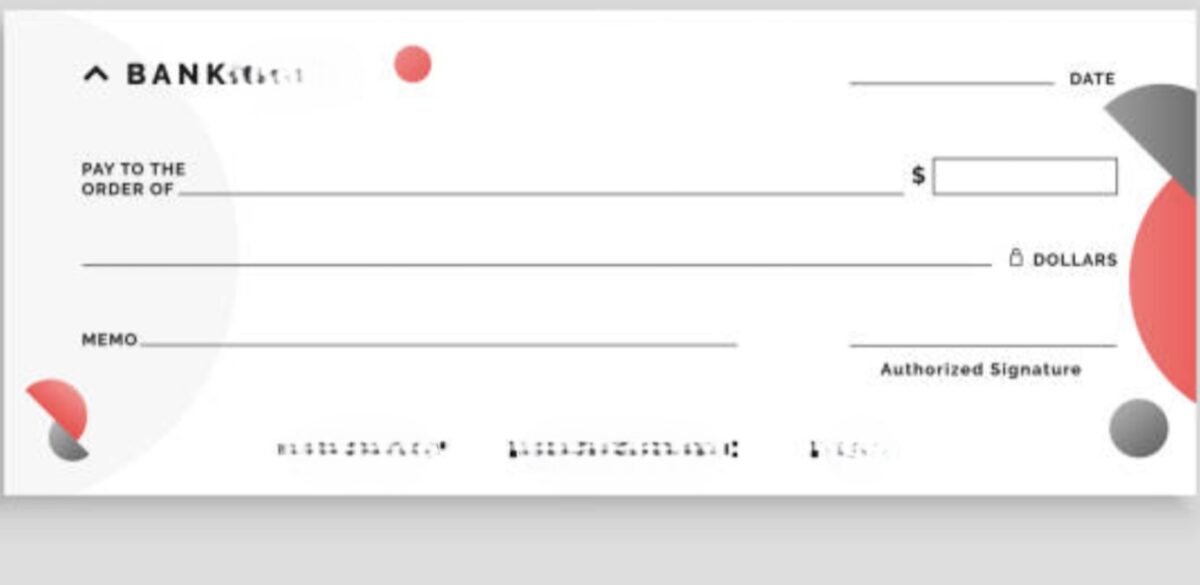
When you need to write a check, ensure you have all the necessary information at hand, including the recipient’s name, the amount of money, and your account details. Follow these steps to properly fill out a check:
1. Date the Check
Start by writing the current date in the top right corner. Use the full date (e.g., January 24, 2025), as this is the most common format. The date ensures the check is valid and helps with record-keeping.
2. Write the Payee’s Name
On the line that starts with “Pay to the order of,” write the full name of the person or business you’re paying. Be sure to spell the name correctly, as mistakes could result in the check being voided or rejected.
3. Write the Amount in Numbers
In the small box to the right of the payee’s name, write the amount of money you are paying in numerical form. For example, $125.50. Make sure the numbers are clear and legible to avoid any confusion.
4. Write the Amount in Words
On the line beneath the payee’s name, write the amount in words. For example, for $125.50, you would write: One hundred twenty-five dollars and 50/100. This ensures there is no ambiguity about the amount you’re paying.
5. Write the Memo
The memo line at the bottom left corner of the check is optional, but it’s a good idea to use it for notes. You can write what the payment is for, such as “Rent for January” or “Invoice #12345.” While it isn’t legally required, the memo helps both the writer and the payee keep track of the purpose of the check.
6. Sign the Check
Lastly, you must sign the check in the bottom right corner. This is your authorization for the check to be cashed or deposited. Make sure your signature matches the one the bank has on file to avoid any issues with processing.
How to Endorse a Check

Once you receive a check, you may need to endorse it before depositing or cashing it. Endorsement is the process of transferring ownership of the check to another party or to yourself.
1. Endorsement for Personal Deposit
If you are depositing a check into your own account, simply sign your name on the back of the check in the endorsement area. This is known as a blank endorsement. For example:
[Your Signature]
Make sure you only endorse the check right before depositing it, as doing so too early can lead to the check being lost or stolen and cashed without your permission.
2. Endorsement for Third-Party Deposit
If you want someone else to deposit the check for you, write “Pay to the order of [Third Party’s Name]” followed by your signature underneath. This is known as a special endorsement. For example:
Pay to the order of [Third Party’s Name]
[Your Signature]
This gives the third party permission to deposit or cash the check on your behalf.
3. Restrictive Endorsement
If you want to limit what can be done with the check (e.g., for deposit only), you can use a restrictive endorsement. Write “For deposit only” followed by your signature. For example:
For deposit only
[Your Signature]
This ensures that the check can only be deposited into your bank account, preventing it from being cashed.
How to Void a Check

If you’ve made a mistake while writing a check or no longer need the check for its original purpose, you’ll need to void it. Void checks are often used to stop payments, especially when dealing with fraudulent activity or errors.
1. Write ‘VOID’ Across the Entire Check
To void a check, write the word “VOID” clearly across the front of the check in large letters. Make sure to cover the entire face of the check but still leave the key details visible, such as the payee’s name and the date. By doing so, it will prevent the check from being used by anyone else.
2. Record the Voided Check
Even though you’ve voided the check, it’s important to record the voided transaction in your check register or digital ledger, just as you would for any other check. Write “VOID” in the same area where you would normally track the check number, payee, and amount. This ensures you keep accurate financial records.
3. Do Not Destroy the Voided Check
Avoid tearing up or destroying a voided check, as it’s a good practice to keep the original check for your records. If needed, you can refer back to the check for clarification, and it also serves as proof that the check was not used.
Key Takeaways
Writing a check might seem like a small detail, but it’s an essential skill for managing your finances and paying bills. Here are the key points to remember:
- Fill out the check clearly, ensuring the date, payee, amount (in numbers and words), and your signature are correct.
- Endorse a check with your signature or a special endorsement, depending on how you intend to deposit or transfer it.
- Void a check by writing “VOID” across it, and keep a record of the voided transaction.
Although writing checks is becoming less common in an increasingly digital world, they remain an important payment method for many people. By following these basic steps, you’ll ensure that your checks are filled out correctly and can be processed smoothly, whether you’re paying someone, receiving a payment, or managing your finances.