
Transferring your domain from WordPress.com to another provider may seem intimidating, but it’s a straightforward process if you follow the right steps. Whether you’re moving to a specialized hosting provider, consolidating domains, or just want more control, this guide will help you transfer your WordPress.com domain safely and efficiently.
Why You Might Want to Transfer Your Domain
There are several reasons to transfer a domain:
- Better hosting options – Some providers offer more flexibility, faster speeds, or better pricing.
- Lower renewal costs – WordPress.com domains may be more expensive to renew.
- Full domain control – You can manage DNS, email, and other services more easily.
- Centralized domain management – Keep all your domains with one provider for convenience.
Step 1: Prepare Your Domain for Transfer
Before initiating the transfer, make sure your domain meets these requirements:
- Domain age – Your domain must be older than 60 days.
- No recent transfers – Domains cannot be transferred again within 60 days of a previous transfer.
- Domain unlocked – Unlock the domain in WordPress.com.
To unlock your domain:
- Log in to WordPress.com
- Go to Domains → Manage → Settings → Unlock Domain
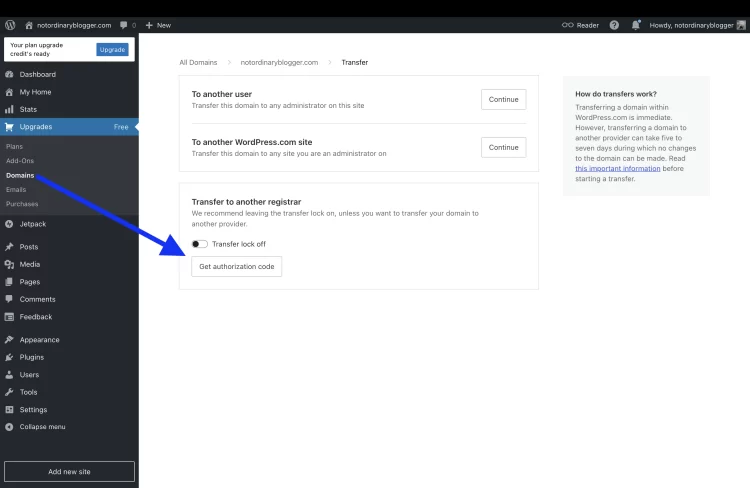
Step 2: Get Your Authorization (EPP) Code
The EPP code is a security key required to transfer a domain.
- In WordPress.com, navigate to Domains → Manage → Settings → Transfer Domain → Get EPP Code
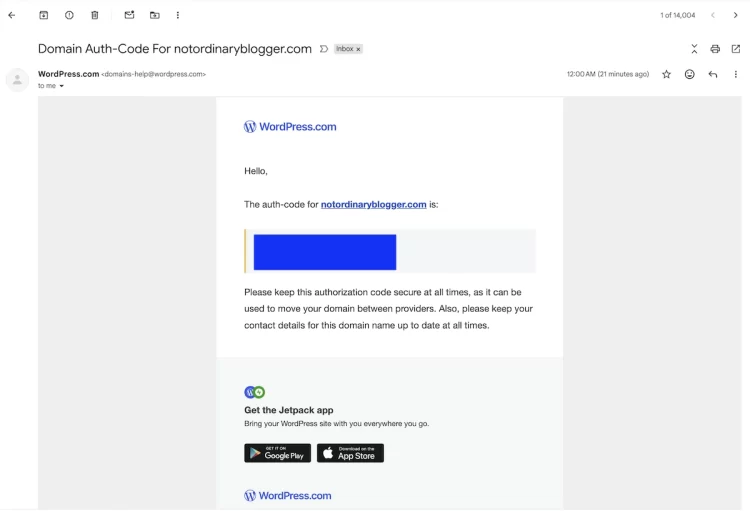
- WordPress will send the EPP code into your email.
- Copy the code, you’ll need it at your new provider.
Step 3: Choose a New Domain Registrar
You can transfer your domain to providers like:
- Namecheap
- GoDaddy
- Google Domains
- Bluehost
Check the registrar’s transfer instructions, as each may vary slightly.
Step 4: Initiate the Transfer
At your new registrar:
- Select Transfer a domain you already own
- Enter your domain name
- Input the EPP/authorization code
- Confirm your contact information
- Pay the transfer fee (usually includes 1-year renewal)
Step 5: Approve the Transfer
- WordPress.com may send an email asking you to approve the transfer.
- Confirm the transfer in the email to continue.
- The process can take 5–7 days to complete.
Step 6: Update DNS and Verify Site Functionality
After transfer:
- Update DNS records to point to your new hosting provider.
- Ensure your website, email, and other services work properly.
- Test your domain thoroughly to prevent downtime.
Tips to Avoid Common Problems
- Don’t let your domain expire – Start the process before renewal deadlines.
- Double-check WHOIS info – Ensure your contact info is up-to-date.
- Backup your site – While the transfer doesn’t move your content, backups are a good safety measure.
- Be patient – Domain transfers can take several days, but most go smoothly.
Transferring your WordPress.com domain to another provider is easier than it seems. With a clear understanding of the steps — unlocking your domain, obtaining your EPP code, choosing a registrar, and approving the transfer, you can complete the process efficiently and maintain full control over your domain.