The Most Common Nintendo Switch Complaint, Explained From the Inside Out
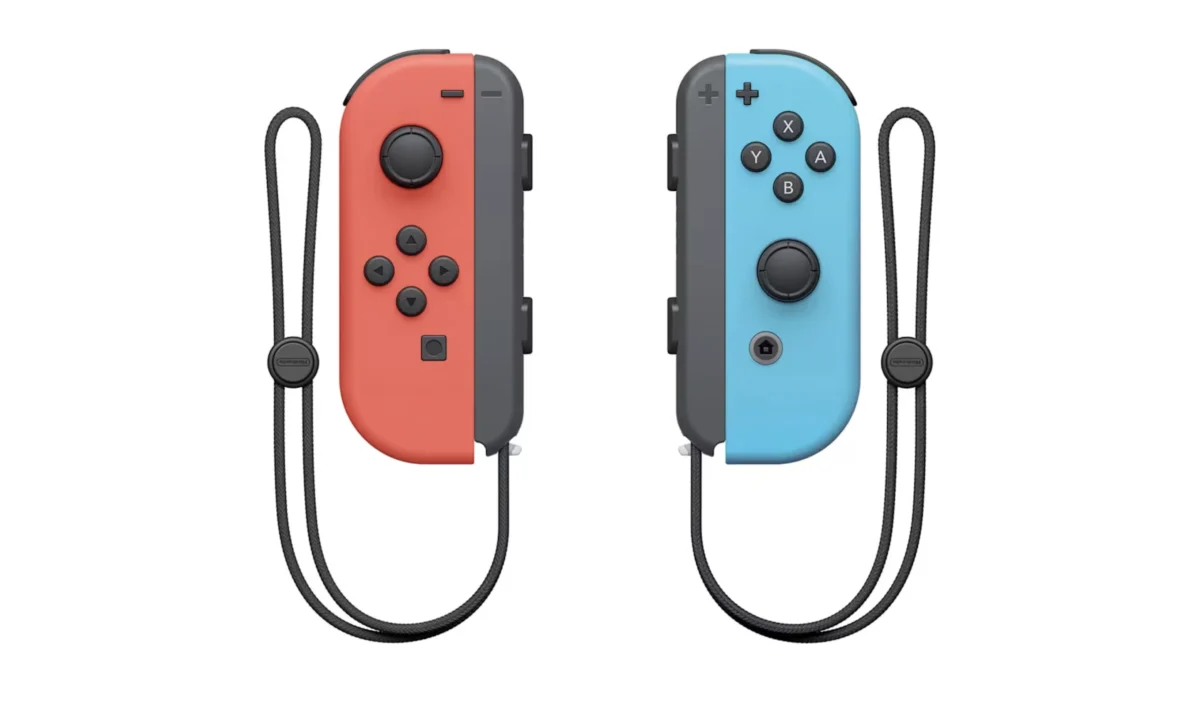
If you own a Nintendo Switch, there’s a good chance you’ve experienced it: your character drifts sideways on a menu screen, or keeps walking in a direction you’re not pushing, even though your hands are nowhere near the stick. This is Joy-Con drift, and it’s not a rare fluke — teardown analysis and user-reported failure data suggest it affects a substantial share of Joy-Con units, with some estimates putting measurable drift at close to 42% of controllers within just 18 months of regular use.
This guide breaks down exactly what’s inside a Joy-Con, why the drift happens at a component level, what it’s cost Nintendo legally, and how to actually fix it yourself with real, current replacement parts.
Why This Keeps Happening: A Design Problem, Not Bad Luck
Before getting into the components, it’s worth understanding that Joy-Con drift isn’t caused by software glitches, dirt, or user error in most cases. The root cause sits inside the analog stick module itself, and it’s the same underlying mechanism that causes drift in PlayStation and Xbox controllers too: a physical wear point built into the design.
What’s Actually Inside a Joy-Con
The Analog Stick Module
Each Joy-Con’s thumbstick uses a potentiometer-based sensor to detect stick position. Inside, a small conductive rubber dome and metal contact slide across a circular carbon film track as the stick moves. That carbon film is genuinely delicate — repeated use gradually abrades it, and the debris created by that wear interferes with the electrical contact, causing the stick to register phantom movement or fail to return cleanly to center. This is a purely mechanical wear problem, which is why cleaning or recalibrating a drifting stick usually only fixes the issue temporarily, if at all.
The Outer Shell and Rail
Each Joy-Con clips onto the side of the Switch console (or a grip accessory) via a metal rail mechanism, alongside the plastic shell housing that contains everything else. The rail’s locking mechanism is a separate, distinct wear point from the joystick, and can develop its own looseness over time independent of any drift issue.
Buttons and Triggers
The face buttons (A/B/X/Y or the left Joy-Con’s directional buttons), along with the SL/SR shoulder buttons unique to the detached Joy-Con form factor, use microswitches rated for roughly 500,000 presses — well within the range of typical ownership, meaning button fatigue is a genuine secondary failure mode alongside stick drift.
Motion Sensors and IR Camera
Unlike a typical controller, each Joy-Con packs a full motion-sensing IMU (accelerometer and gyroscope) into a genuinely small enclosure, and the right Joy-Con additionally includes an infrared camera used for select motion-based games. This density is part of why Joy-Cons are considered a more mechanically complex repair than a standard console controller — there’s meaningfully less internal space to work in, and the IR window and motion sensor components can be damaged by a careless repair.
HD Rumble
Joy-Cons use a haptic feedback system Nintendo calls HD Rumble, capable of a wider and more precise range of vibration sensations than traditional rumble motors, contributing to effects like the sensation of individual ice cubes moving inside a virtual glass. Like other haptic components, these can fail independently of the stick or buttons.
Battery and Sync Components
Each Joy-Con contains its own small rechargeable battery and a wireless sync system used to pair with the console or a grip accessory. Battery degradation over years of use is a slower-developing but genuine failure mode distinct from drift.
The Legal History Behind This Component Failure
Joy-Con drift isn’t just a common repair topic — it’s been the subject of years of litigation, and understanding that history adds useful context for anyone frustrated by the issue.
Nintendo first faced public pressure over the issue in mid-2019, when a Reddit thread on the topic gained more than 25,000 upvotes, followed shortly by multiple proposed class-action lawsuits in the US alleging the Joy-Con design was defective. Nintendo didn’t publicly acknowledge the problem in detail until 2020. Several of the earlier US cases were dismissed or moved into arbitration due to the Switch’s end-user license agreement, and in one prominent case, a federal judge ultimately ruled in Nintendo’s favor in 2023, in part because the console’s EULA restricted the ability to bring a class-action lawsuit at all.
The legal picture shifted meaningfully in mid-2026, when French regulator the DGCCRF fined Nintendo of Europe €35 million (roughly $40 million), determining that the company had engaged in misleading commercial practices between 2018 and 2023 by failing to adequately disclose the known Joy-Con defect to consumers. Nintendo has stated that paying the fine does not constitute an admission of guilt. Separately, a US class action covering Joy-Con purchases made since March 2017 remains active as of 2026, with some legal analysts estimating potential individual payouts, if a settlement is reached, in the range of $20 to $200 per claimant.
Nintendo has, notably, offered free Joy-Con drift repairs for eligible units for several years, regardless of official warranty status — a detail worth checking before paying for a third-party repair or replacement, particularly if you still have a proof of purchase.
Fixing Drift Yourself: What You Actually Need
Repairing drift yourself is meaningfully cheaper than replacing a Joy-Con outright, and doesn’t require soldering — modern replacement joystick modules use a press-fit or ribbon-cable connector rather than a soldered connection. The main tool requirement is a Y000 tri-point screwdriver, which is a different bit than the more common Phillips or Torx screwdrivers, since Nintendo uses tri-point screws on the Joy-Con shell.
Shop Joy-Con replacement joystick kits:
- Official iFixit repair guide — Left Joy-Con Joystick Replacement — free step-by-step teardown guide with photos
- Veanic Replacement Joystick Repair Kit — includes the Y1.5 tri-point and cross screwdrivers, tweezers, and pry tools needed for the full repair
- ElecGear Joystick Replacement (2-Pack) — covers both standard Joy-Con and Switch Lite
For a drift-resistant upgrade rather than a like-for-like replacement:
- BRONAL TMR Hall Effect Joystick (32-in-1 kit) — uses magnetic sensing instead of the original carbon-film potentiometer design, which removes the physical wear mechanism that causes drift in the first place, similar to the Hall-effect upgrades available for PS5 DualSense controllers
After installing any replacement stick, calibrate it through the Switch’s system settings — most drift-fix kits won’t center perfectly without this step, and some repairs may also require a full power cycle of the console (holding the power button for 10–15 seconds) before the new stick registers correctly.
A Buying Caution Worth Repeating
Nintendo does not sell bare Joy-Con circuit boards or joystick modules directly to consumers or resellers, so any listing claiming “genuine OEM Nintendo parts” for an individual joystick module should be treated with skepticism. Reputable third-party replacement modules are widely available and generally reliable, but they’re aftermarket parts, not components sourced from Nintendo itself. Extremely low-priced listings are also worth approaching cautiously, since unusually cheap kits have been associated with missing calibration firmware or non-functional components in independent testing.
Frequently Asked Questions
Will Nintendo fix Joy-Con drift for free?
Often, yes — Nintendo has offered free drift repairs for eligible units for several years, generally regardless of standard warranty status, if you’re the original purchaser with proof of purchase. It’s worth checking this option before paying for a third-party repair.
Does opening my Joy-Con to fix it myself void my warranty?
Yes, opening the shell does void any remaining standard warranty. However, since Nintendo’s drift-specific repair program typically doesn’t require an intact factory seal, a DIY repair generally won’t disqualify a unit from a future official drift repair if it still meets Nintendo’s eligibility criteria.
Are Hall-effect replacement sticks better than the originals?
Yes, mechanically. Because they sense position with a magnet and sensor rather than a physical contact sliding across a wear-prone track, Hall-effect and TMR modules remove the specific mechanism that causes drift in the original potentiometer design — the same upgrade path used for PS5 DualSense stick repairs.
Disclaimer: No affiliate links are used in this article. All product links are provided purely as a convenience so readers can view and verify items directly on the retailer’s site — this blog does not earn a commission from any click or purchase made through these links.